Salmon a la plancha with citrus-dill-vodka marinade

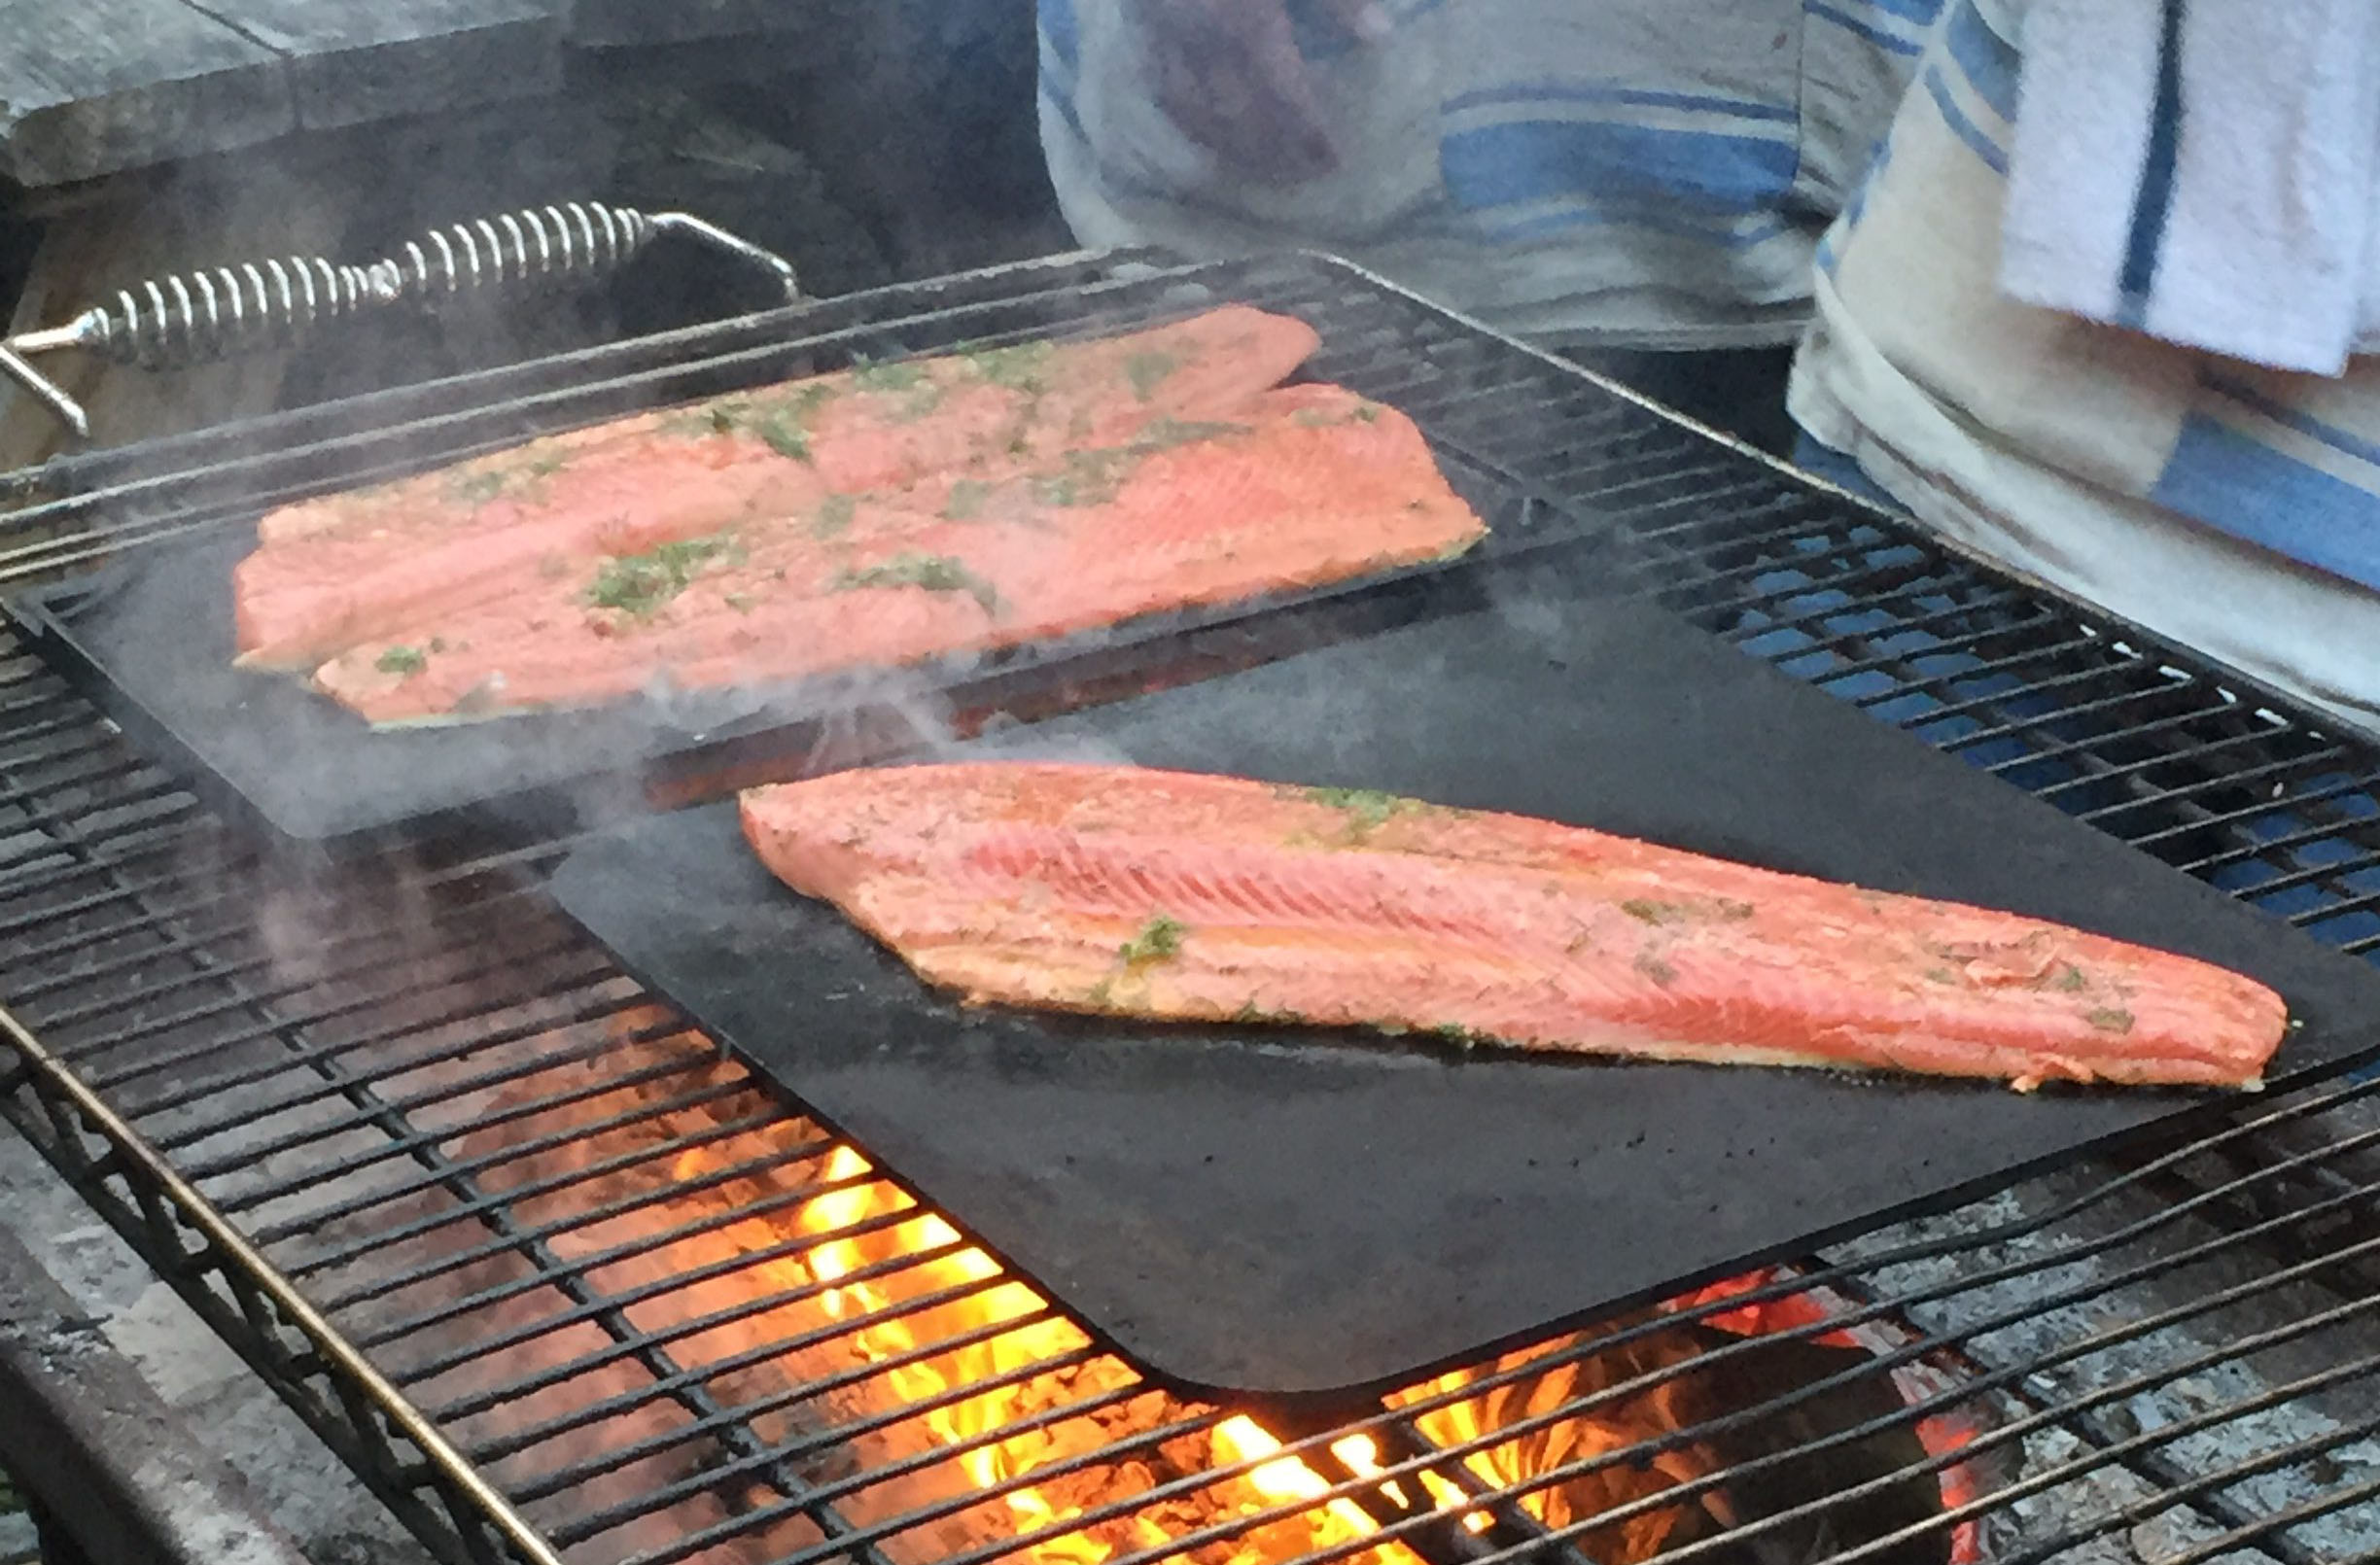
In Spain, cooking a la plancha—grilled on a metal plate–is a time-honored technique for preparing fish. Although free-form metal sheets were regularly used in the past, and sometimes still are, cast-iron griddles with a smooth surface are a better choice. I have a well-seasoned, large rectangular griddle that fits over two burners of my gas stove top and also works well on my outdoor grill. It is great not only for fish and seafood but also for vegetables that tend to fall through the bars of the grill grate and for flatbreads. It measures almost 20 in [50 cm] long and is 10 in [25 cm] wide and is the perfect size for a whole side of salmon. When the surface is smoking hot, the skin on the salmon sizzles the moment it touches the pan.

YIELD

Serves 6

INGREDIENTS:

1 whole side of salmon, about 3 lb [1.4 kg], skin on and scaled, pin bones removed
1/4 cup [60 ml] extra-virgin olive oil, plus more for rubbing
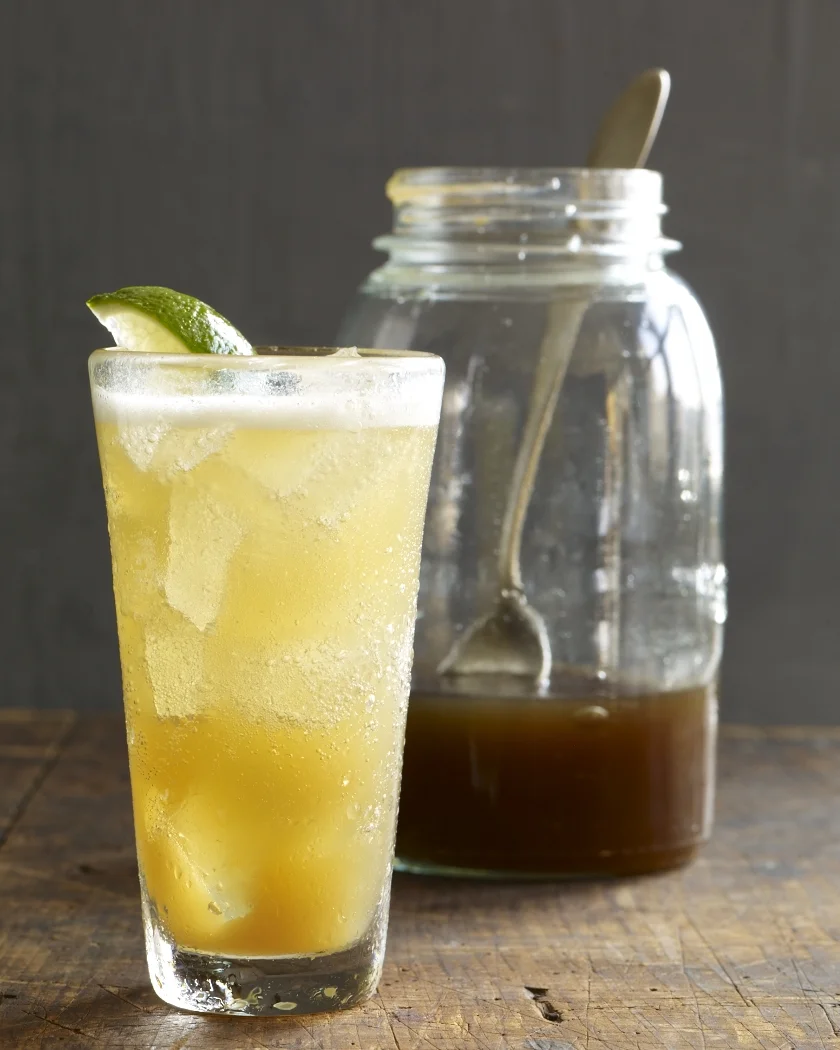
2 Tbsp vodka
Grated zest of 1 lemon, plus 2 Tbsp fresh lemon juice
2 Tbsp chopped fresh dill
1/2 tsp fine sea salt
1/2 tsp freshly ground black pepper

You will also need
Plancha (large, rectangular griddle)

INSTRUCTIONS:

Remove the salmon from the refrigerator 30 minutes before grilling to bring it to room temperature. Pat dry with paper towels.

Prepare a medium-hot fire in a charcoal grill or preheat a gas grill to medium-high.

In a small bowl, combine the olive oil, vodka, lemon zest, lemon juice, dill, salt, and pepper and mix well.

Place the salmon side, flesh-side down, on a large, rimmed baking sheet. Rub the skin generously with olive oil. Turn the salmon over, flesh-side up, and pour the marinade evenly over the top. Set aside while the grill heats.

When the grill is hot, place the plancha on the grill grate directly over the fire and cover the grill. After 10 minutes, the plancha should be smoking hot. (If your plancha is well seasoned, there is no need to oil the surface. If it is new, brush it with oil to be sure the skin of the fish won’t stick.) Uncover the grill, transfer the salmon fillet, skin-side down, to the plancha, and re-cover the grill. Cook the salmon, without turning it, until it is almost opaque throughout but still very moist, or an instant-read thermometer inserted into the center registers 115º to 120ºF [45º to 49ºC], 15 to 20 minutes, depending on the thickness of the fillet.

Using two long spatulas, transfer the salmon to a warmed platter. Serve the whole side of salmon on the platter family-style, or cut the salmon into individual portions and transfer to warmed dinner plates. Serve immediately. (I let the plancha cool down in place, or use tongs, heatproof gloves, or the spatulas to move the plancha to a heatproof surface to cool down.)

Korean-style grilled beef short ribs

For those who like to have finger-lickin’ grilled foods to nibble, these beef short ribs, marinated in a Korean-style soy marinade seasoned with garlic, green onions, and lots of fresh ginger, are a savory, smoky budget-friendly treat. Serve accompanied with Biwa Daikon Kimchi, or buy prepared kimchi, the fiery Korean pickled cabbage stocked in Asian markets or in the Asian foods section of large supermarkets. Many Asian markets sell beef short ribs cut flanken style, but you may need to order these from your butcher. Ask for beef chuck with ribs, sawed crosswise through the bones into strips about ½ inch/12 millimeters thick.

YIELD

Serves 4 or 5 as a main course

INGREDIENTS:

⅔ cup/165 ml soy sauce
⅓ cup/75 ml mirin (Japanese sweet cooking wine)
⅓ cup/75 ml unseasoned rice vinegar
⅓ cup/65 g firmly packed dark brown sugar
3 tbsp Asian sesame oil
¼ cup/30 g peeled and minced
fresh ginger
2 tbsp finely minced garlic (about 7 cloves)
4 green onions, including green tops, minced
½ tsp freshly ground pepper
3 to 3½ lb/1.4 to 1.6 kg beef short ribs, cut flanken style (½ in/12 mm thick across the bones)
Vegetable oil for brushing

INSTRUCTIONS:

To make the marinade, in a medium bowl, whisk together the soy sauce, mirin, vinegar, brown sugar, sesame oil, ginger, garlic, green onions, and pepper.

Arrange the beef ribs in a large baking dish, pour the marinade over the top, and turn the meat several times until well coated. Cover and refrigerate for at least 3 hours or up to 8 hours. Alternatively, put the beef ribs in a jumbo-size, freezer-strength lock-top plastic bag, pour the marinade over the top, squeeze out all of the air, and seal the bag. Massage the bag to coat all of the beef evenly with the marinade. Place on a rimmed baking sheet and refrigerate.

Remove the beef from the refrigerator 1 hour before you plan to begin grilling. Remove the beef ribs from the marinade, drain or blot lightly, and place on a rimmed baking sheet. Discard the marinade. Prepare a medium-hot fire in a charcoal grill or preheat a gas grill to medium-high.

Brush the grill grate with vegetable oil. Place the beef ribs, without crowding, directly over the fire and cover the grill. Cook until nicely seared on one side, about 3 minutes. Using tongs, turn the ribs, re-cover, and cook until seared on the second side, 3 to 4 minutes longer. The meat should be lightly charred at the bones and cooked through with no pink.

Remove from the grill, pile on a warmed platter and serve immediately.

Ginger panna cotta

YIELD

Serves 8 or 9

INGREDIENTS:

3 cups/720 ml heavy whipping cream
½ cup/120 ml milk
2½ oz/70 g fresh ginger, peeled and minced
½ vanilla bean, split lengthwise
One ¼-oz/7-g packet powdered gelatin (scant 1 tbsp)
3 tbsp water
⅔ cup/130 g granulated sugar
Pinch of kosher or fine sea salt

INSTRUCTIONS:

  1. In a medium, heavy saucepan, combine the cream, milk, and ginger. Using a small paring knife, scrape the seeds from the vanilla bean halves into the pan and then add the bean halves. Place over medium heat and heat until the liquid begins to foam around the edges of the pan, about 5 minutes. Remove from the heat, cover, and let steep for 15 minutes.
  2. Meanwhile, in a small, heat-resistant bowl, stir together the gelatin and water and set aside to allow the gelatin to soften, about 5 minutes. Pour hot water to a depth of 1 to 2 in/2.5 to 5 cm into a slightly larger bowl and rest the base of the gelatin bowl in the water. Stir until the gelatin is dissolved and clear, 2 to 3 minutes.
  3. Strain the hot cream mixture through a fine-mesh sieve held over a medium bowl. Stir in the sugar and salt until dissolved and then whisk in the gelatin mixture. Let the mixture cool until it is still warm but not hot, stirring occasionally so the vanilla seeds will be dispersed evenly in the finished dessert.
  4. Divide the warm mixture evenly among eight or nine ½-cup/120-ml ramekins. Cover with plastic wrap and refrigerate until set, at least 4 hours. (They will keep for up to 3 days.) Serve chilled.

Brown sugar and ginger ice cream

Making ice cream is a fun summer weekend activity, whether you’re churning it in an old-fashioned hand-cranked maker or going modern with an electric one. Here, the brown sugar delivers a slight molasses note to the extra-rich gingery ice cream. If you like, top each serving with berries, chocolate sauce, sugar-crusted walnuts, or even homemade Candied Young Ginger.

YIELD

MAKES ABOUT 1 QT/960 ML

INGREDIENTS:

2½ cups/600 ml heavy whipping cream
1¼ cups/300 ml milk
⅔ cup/130 g firmly packed light brown sugar
½ cup/100 g granulated sugar
3 oz/85 g fresh ginger, peeled and minced
¼ tsp kosher or fine sea salt
7 egg yolks, lightly beaten

INSTRUCTIONS:

  1. In a medium, heavy saucepan, combine the cream, milk, brown sugar, granulated sugar, ginger, and salt. Place over medium heat and warm the mixture, stirring often to dissolve the sugars, until the liquid begins to foam around the edges of the pan, about 5 minutes. Remove from the heat, cover, and let steep for 15 minutes.
  2. Have ready an ice bath. Strain the cream mixture through a fine-mesh sieve placed over a bowl. Return the liquid to the pan, place over medium heat, and cook, stirring occasionally, until the mixture is almost at a simmer. Slowly add ½ cup/120 ml of the hot cream mixture to the beaten egg yolks while whisking constantly. (This will temper the yolks so they don’t curdle when added to the hot liquid.) Then whisk the egg yolk mixture into the cream mixture and continue to cook over medium-low heat, whisking constantly, until the custard thickens, 7 to 10 minutes. The custard is ready when it registers 175°F/80°C on an instant-read thermometer. Remove from the heat and pour through a fine-mesh sieve set over a medium heatproof bowl, and then nest the bowl in the ice bath to cool, stirring the custard occasionally.
  3. When the custard is well chilled and thick, transfer it to an ice-cream maker and churn according to the manufacturer’s directions. Transfer the ice cream to a freezer container with a tight-fitting lid and place it in the freezer until it is solid and scoopable, about 4 hours, before serving.

Homemade Ginger Ale

GINGER_ALE_014.jpg

Who knew it could be so simple to make ginger ale at home? Here’s an all-natural version, blissfully free of high-fructose corn syrup and preservatives. When I compared this homemade ginger ale to a national brand, it proved unrivaled in spicy, aromatic ginger flavor. Although the ginger syrup recipe makes enough for just four servings, it is easily doubled. Store the remainder in the refrigerator to use whenever you crave a tall, sparkling glass of refreshing ginger ale.

Makes 1 cup/240 ml ginger syrup; enough for 4 drinks

Ginger Syrup
1/2 cup/55 g grated fresh ginger
1 cup/200 g firmly packed light brown sugar
1 cup/240 ml water

Ice cubes
4 cups/960 ml club soda
1/4 cup/60 ml fresh lime juice
1 tbsp plus 1 tsp fresh lemon juice
4 lime wedges

To make the ginger syrup, in a small saucepan, combine the ginger, brown sugar, and water and bring to a boil over high heat, stirring constantly until the sugar dissolves. Reduce the heat and simmer for 5 minutes to completely dissolve the sugar and infuse the syrup. Remove from the heat and let the ginger steep in the syrup until cool, about 30 minutes. Strain the syrup through a fine-mesh sieve placed over a container with a tight-fitting lid and then cover and refrigerate until well chilled. (The syrup will keep in the refrigerator for up to 2 weeks.)

To make the ginger ale, fill four 16–fl oz/480-ml glasses two-thirds full of ice. Pour 1/4 cup/60 ml of the syrup, 1 cup/240 ml of the club soda, 1 tbsp of the lime juice, and 1 tsp of the lemon juice into each glass and stir to combine. Garnish each glass with a lime wedge and serve immediately.

Celery root purée with anjou pear

When summer fades and the markets fill with fall fruits and roots, make this savory-sweet purée of pears and celery root, a perfect accompaniment to roast pork tenderloin or to pork of any kind.

YIELD

Serves 8 as a side dish

INGREDIENTS:

1 large celery root, 11/2 lb/680 g, trimmed, peeled, and cut into 1-in/2.5-cm cubes
11/2 tsp kosher or fine sea salt
4 Anjou pears, about 2 lb/910 g
1/4 cup/55 g unsalted butter
1/2 cup/60 ml dry vermouth
1/4 tsp freshly grated nutmeg
1/2 cup/120 ml heavy whipping cream, warmed
Freshly ground white pepper

INSTRUCTIONS:

Fill a 6-qt/5.7 L saucepan two-thirds full of water. Add the celery root and 1 tsp of the salt, cover partially, and bring to a boil over high heat. Reduce the heat so the water simmers and cook until the celery root is tender when pierced with a knife, about 15 minutes. Drain the celery root in a colander and return it to the pan. Place the pan over low heat for 1 minute to evaporate any excess moisture.

Meanwhile, using a vegetable peeler, peel, halve, and core the pears and cut them into 1-in/2.5-cm chunks. In a large frying pan, melt the butter over medium heat. Add the pears and the remaining 1/2 tsp of salt and cook, stirring occasionally, until the pears are soft, about 5 minutes. Add the vermouth and nutmeg and continue cooking until the pears are very soft and the sauce thickens, about 5 minutes more. Remove the pan from the heat.

In a food processor, combine half the celery root, half the pears, and half the cream and process until completely smooth. Transfer the purée to a warmed serving bowl. Repeat with the remaining celery root, pears, and cream and add to the bowl.

Season the purée with salt and white pepper. Serve immediately, or keep warm in the top of a double boiler or cover and rewarm in a microwave oven.

Salmon carpaccio with celery root slaw

I like to pair salmon and celery root because they complement each other in texture and taste. In this dish, silky, wafer-thin slices of lightly cured salmon contrast beautifully with the matchstick-cut crunch of the raw root. The slaw is tossed in a mustardy mayonnaise-based dressing and accented with chives and parsley. Minced cornichons and capers are added to punch up the tang of the dressing and deliver textural interest. If you have time, make the slaw a day in advance of serving to allow all the flavors to meld.

YIELD

Serves 6 as a first course

INGREDIENTS:

Celery Root Slaw

1/4 cup [60 ml] mayonnaise
1/4 cup [60 ml] sour cream
1 1/2 tsp whole-grain mustard
2 tsp fresh lemon juice
1 1/2 tsp cider vinegar
1 Tbsp minced cornichons
1 Tbsp drained brined capers, rinsed, patted dry, and minced
Fine sea salt
Freshly ground black pepper
One 1-lb [455-g] celery root
2 Tbsp finely snipped fresh chives
1 Tbsp minced fresh flat-leaf parsley

Carpaccio
One 1-lb [455-g] center-cut salmon fillet, skin and pin bones removed
6 Tbsp [90 ml] lemon-infused extra-virgin olive oil
Flake sea salt, such as Maldon

INSTRUCTIONS:

To make the slaw:

In a large bowl, whisk together the mayonnaise, sour cream, mustard, lemon juice, vinegar, cornichons, and capers. Season with fine sea salt and pepper. Set aside.

Using a sharp knife, cut off the base and a thin slice from the top of the celery root and then cut the root in half lengthwise. Pare away the tough outer skin from one of the halves. Using a chef’s knife, mandoline, or the julienne blade of a food processor, cut the peeled half into matchsticks. Immediately add the matchsticks to the bowl holding the dressing and toss to coat them thoroughly to prevent browning. Repeat with the second half of the celery root. Add the chives and parsley and mix well. Taste and adjust the seasoning. Cover and refrigerate for at least 1 hour before serving. (This would be a good time to chill six salad plates for serving. The slaw can be prepared up to 1 day in advance and stored in a covered container in the refrigerator.)

To prepare the carpaccio:

Using a very sharp, thin-bladed knife, slice the fish crosswise (against the grain) into 18 wafer-thin slices. Lay the slices side by side on a large baking sheet. Brush both sides of each salmon slice with the lemon oil. Season the top side of each slice with flake sea salt. Set aside for 20 minutes.

Divide the salmon evenly among chilled salad plates, overlapping the slices slightly. Spoon a generous serving of the slaw next to the salmon and serve immediately.

COOKS NOTES

One convenient do-ahead step is to slice the salmon an hour in advance. Seal the cut salmon tightly by pressing a large sheet of plastic wrap directly onto the flesh, smoothing the plastic wrap to press out any air pockets, and then refrigerate the salmon. Twenty minutes before serving, remove the salmon from the refrigerator and proceed as directed.

Salmon stock

Salmon sportfishermen who are used to gutting, cleaning, and filleting their catches—and who don’t discard the salmon heads or use them for bait—can use the bones and head to make a lovely stock, beautifully pale peach in color. If you don’t go salmon fishing or have friends who fish, ask your fishmonger to save you a salmon head that has the gills removed.

Salmon stock needs only an hour to simmer. Cooking the stock too long gives it a bitter taste.

1 salmon head (2 to 2 1/2 pounds)
1 small onion, quartered
2 cloves garlic
1 carrot, cut into 2-inch chunks
1 bay leaf
3 sprigs fresh thyme
5 black peppercorns
6 cups cold water
1 cup dry white wine

Rinse the salmon head and remove the gills, if necessary, leaving the gill plates intact. Using a sharp knife, split the salmon head in half lengthwise. Place the salmon in a 6-quart saucepan and add the onion, garlic, carrot, bay leaf, thyme, and peppercorns to the pan. Add the water and wine. The fish head should be completely submerged; if not, add a bit more water. Bring the liquid to a boil and then reduce to a bare simmer. Partially cover the pot and simmer for 1 hour.

Using tongs or a large, slotted spoon, transfer the pieces of salmon and the vegetables to a large fine-mesh sieve set over a large bowl to catch all the juices. Do not press on the solids. Pour the stock through the sieve into the large bowl. Discard the solids. Let the stock cool. (To cool the stock quickly, set the bowl in a larger one filled with ice water, or a sink with about 2 inches of ice water.) Stir the stock occasionally to help cool it down. Cover and refrigerate the stock for up to 2 days. Once the stock is chilled, skim any congealed fat from the surface using the side of a large spoon. To keep the stock longer, transfer to a freezer container, allowing 1 inch of headspace, and freeze for up to 6 months.

Makes 5 cups